Models
The Models page is where you add and manage every model your organisation can call through Routero. Models are grouped by the Public Model Name callers use; each group can sit over one or more deployments.
Open Models in the sidebar (organisation admins only).
The Models page
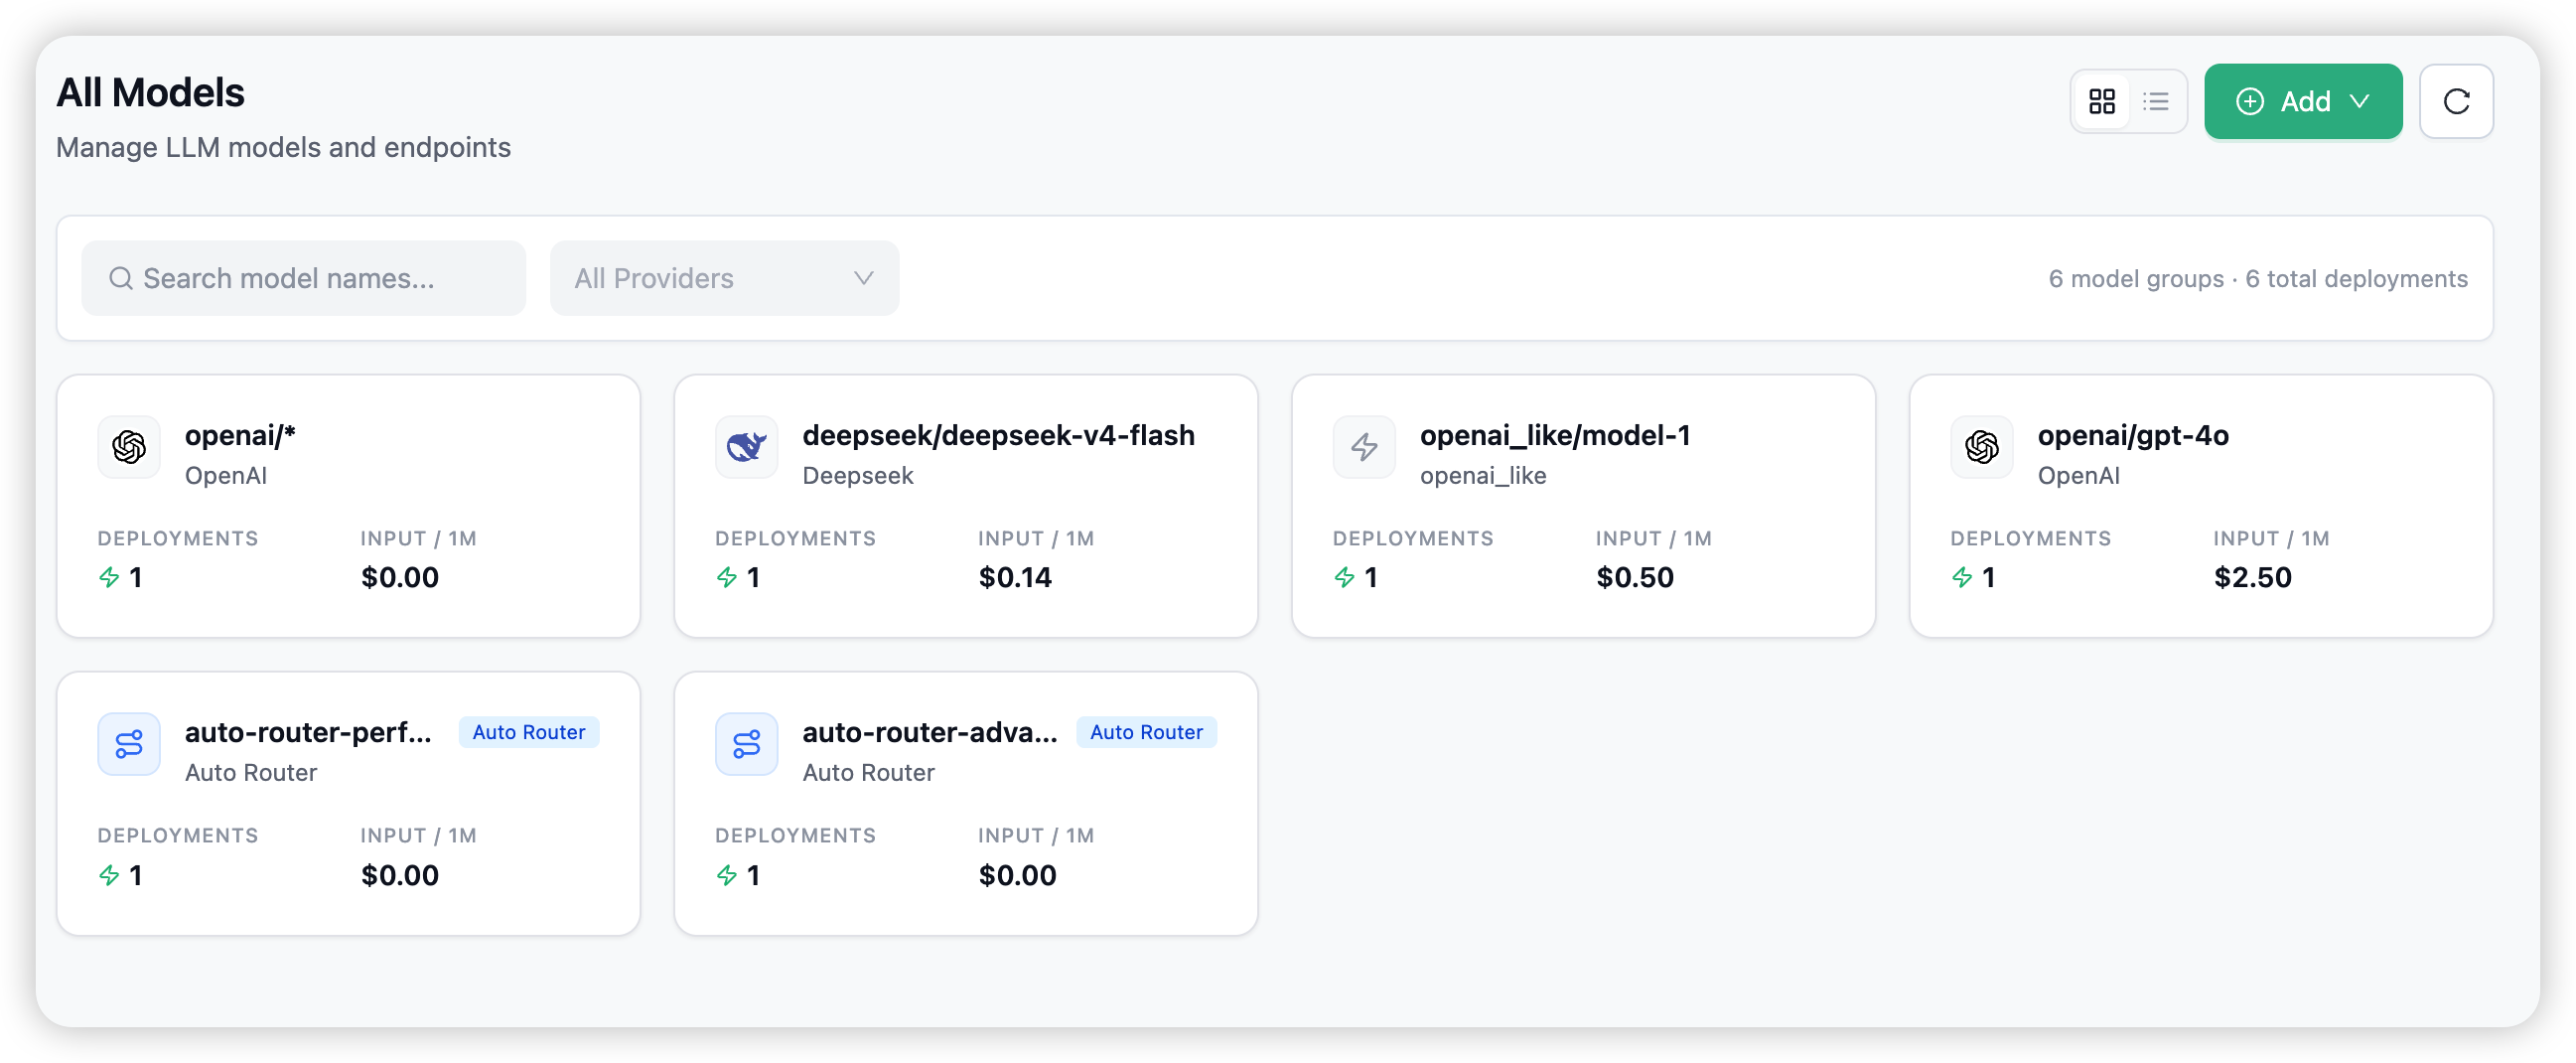
The grid view shows each model group as a card — its Public Model Name, the number of Deployments behind it, the providers, and the cost. The toolbar totals your groups and deployments. Switch to the table view to see individual deployments (the underlying model, provider, and cost per row).
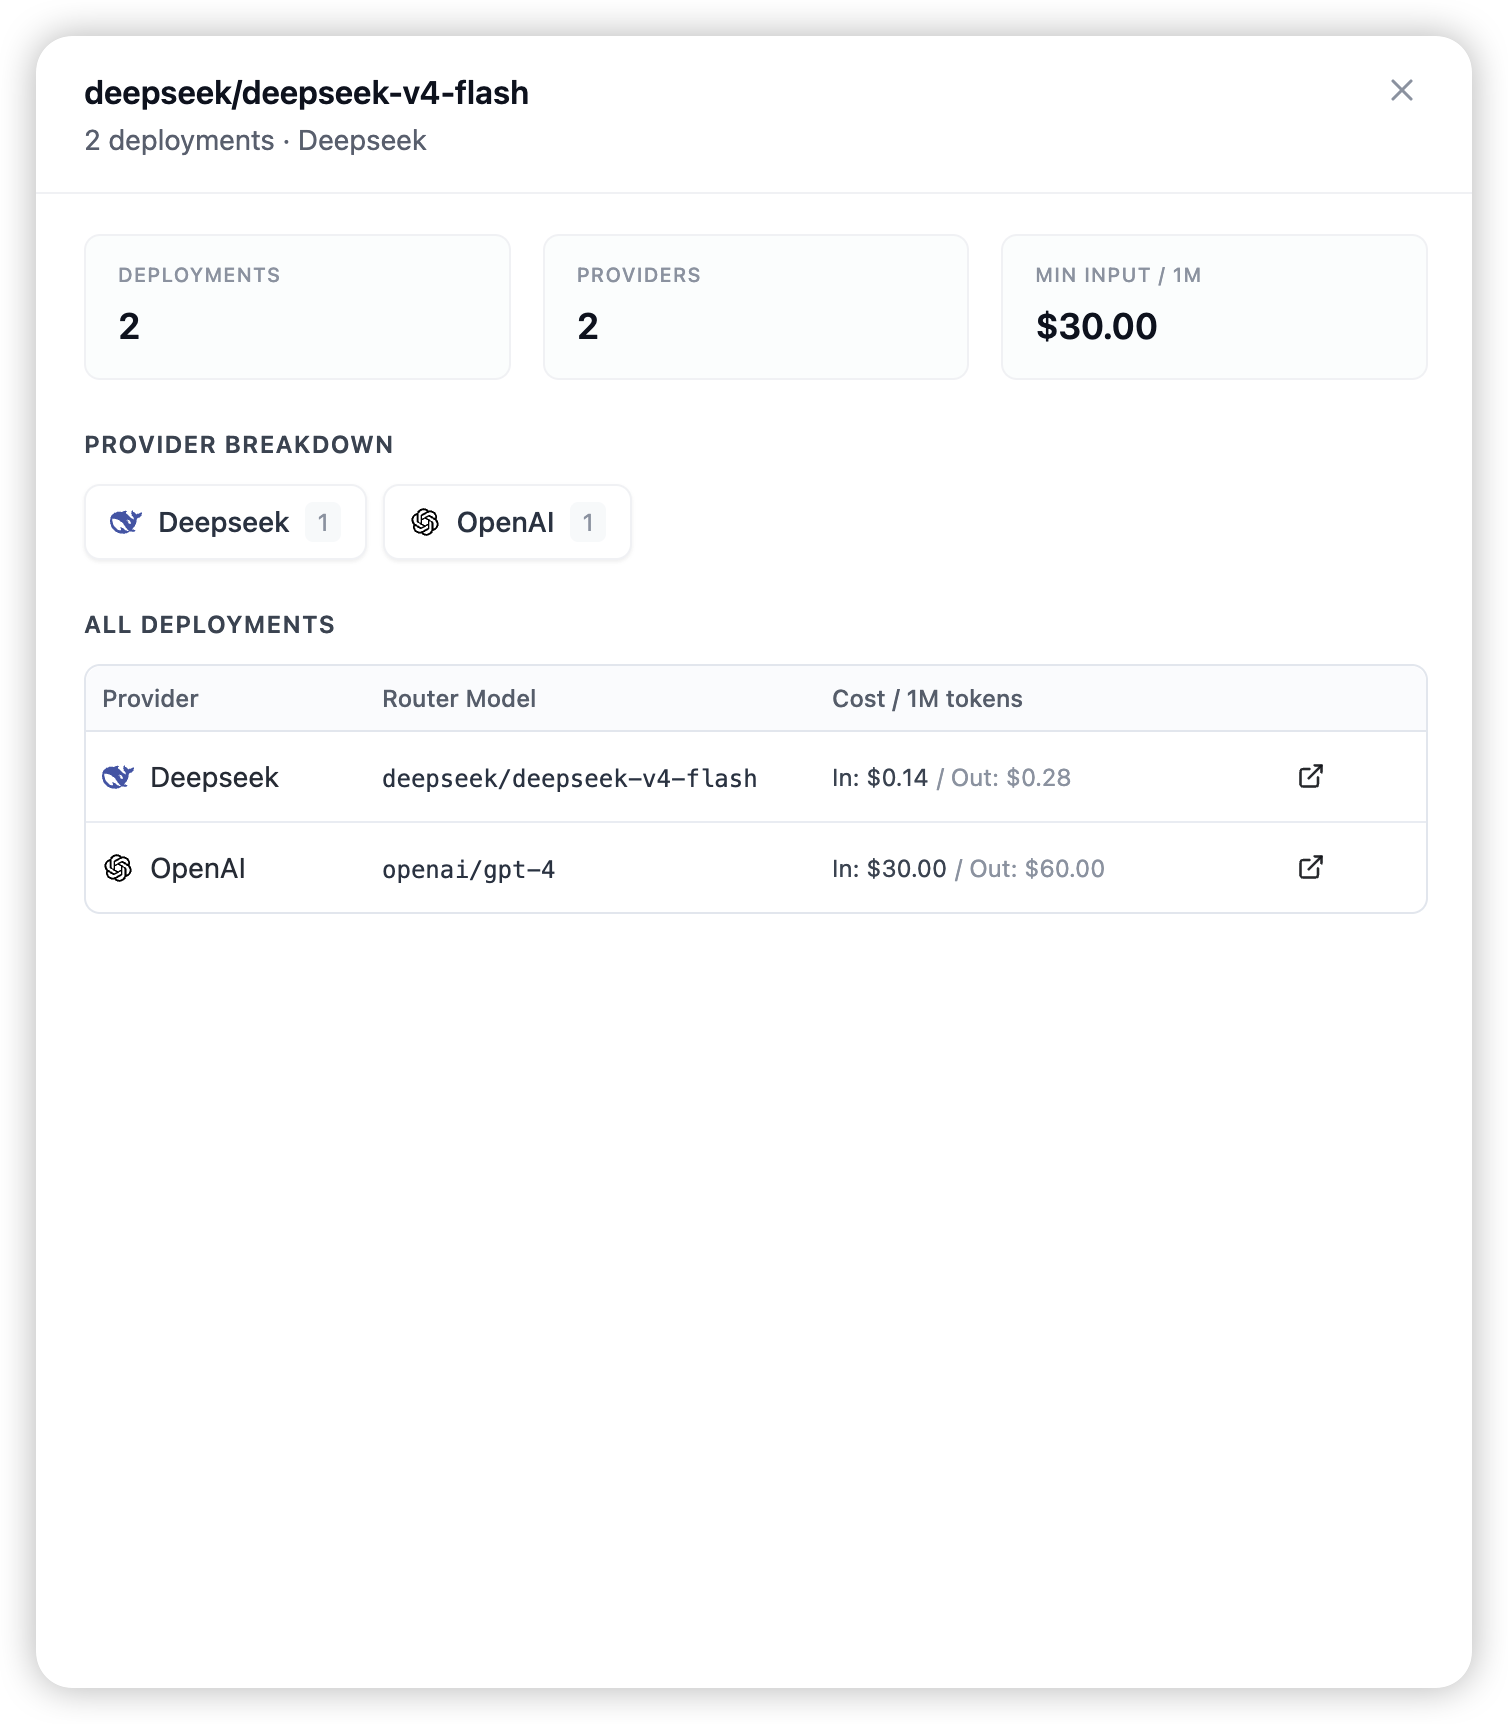
Click a card to open the group and see every deployment behind the name.
Add a model
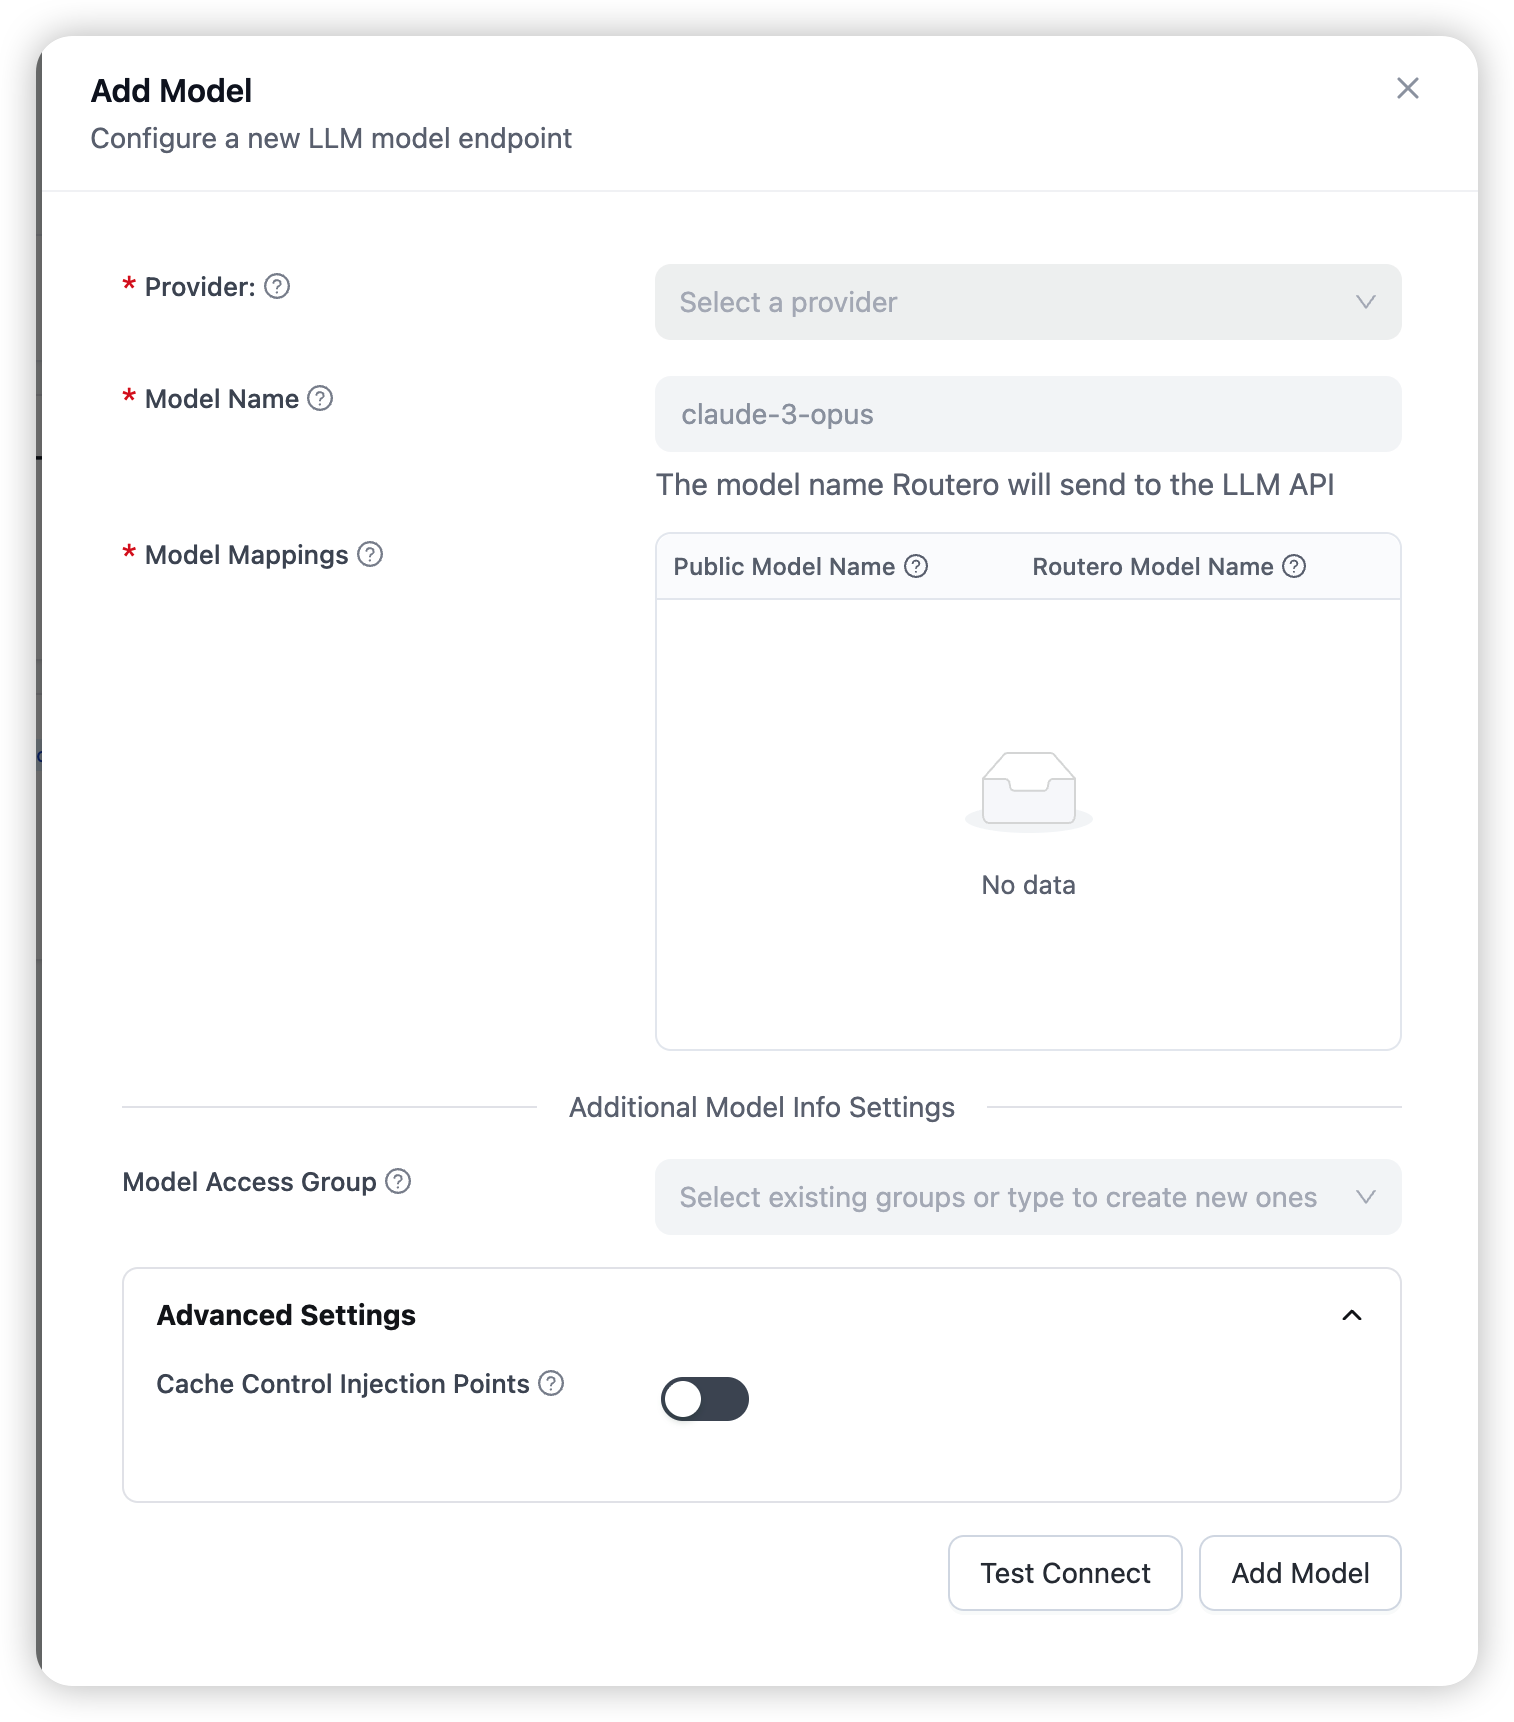
Choose + Add Model. In the drawer:
- Provider — pick a provider assigned to your organisation.
- Model Name — choose a model, or “All {Provider} Models” to expose them all.
- Public Model Name — the alias your application sends to Routero (the
modelvalue in requests). Keep the default or rename it.
Click Add Model (or Test Connect first to check the provider is reachable).
No providers listed? Your platform admin hasn’t assigned a provider key to your organisation yet — ask them to add one. To bring your own provider key instead, see BYOK.
Giving several models the same Public Model Name creates a model group that Routero load-balances across — see Routing & Load Balancing.
Model settings and detail
Open a model to manage it:
- Model Settings — per-deployment TPM/RPM limits, retries, timeout, and tags.
- Policy — bind a policy (guardrails, prompts, memory, token saving) to the model.
- Test Connection — verify the deployment is reachable.
- Delete Model — remove a model you own.
Health check
From the table view, run an on-demand Health Check to see each deployment’s current status (healthy or unhealthy).
Related
→ Routing & Load Balancing — how requests spread across a model group’s deployments. → Auto Router — a virtual model that picks the best model by intent (created from Add → Auto Router). → BYOK — use your own provider key for a provider.